


Proper tracking is crucial to the success of any PPC campaign.
If you aren't tracking conversions correctly, you won't have the right data flowing into ad accounts to make informed decisions about keywords, ad copy, and audiences.
Unfortunately, implementation can be a barrier for accounts of all sizes. An overworked developer or a bureaucratic IT department can take weeks to add a simple Google Ads conversion code.
Thankfully, Google Tag Manager provides a solution to save time and back-and-forth communication when implementing tracking codes. Once a single code has been installed on the site, PPC marketers can then have full access to add as many ad platform tags as they need.
This article will walk you through how to set up Google Tag Manager (GTM) and deploy tags for major ad platforms.
Setting Up Google Tag ManagerIf you haven't yet created a GTM account, start here. The interface will walk you through setting up a new account.
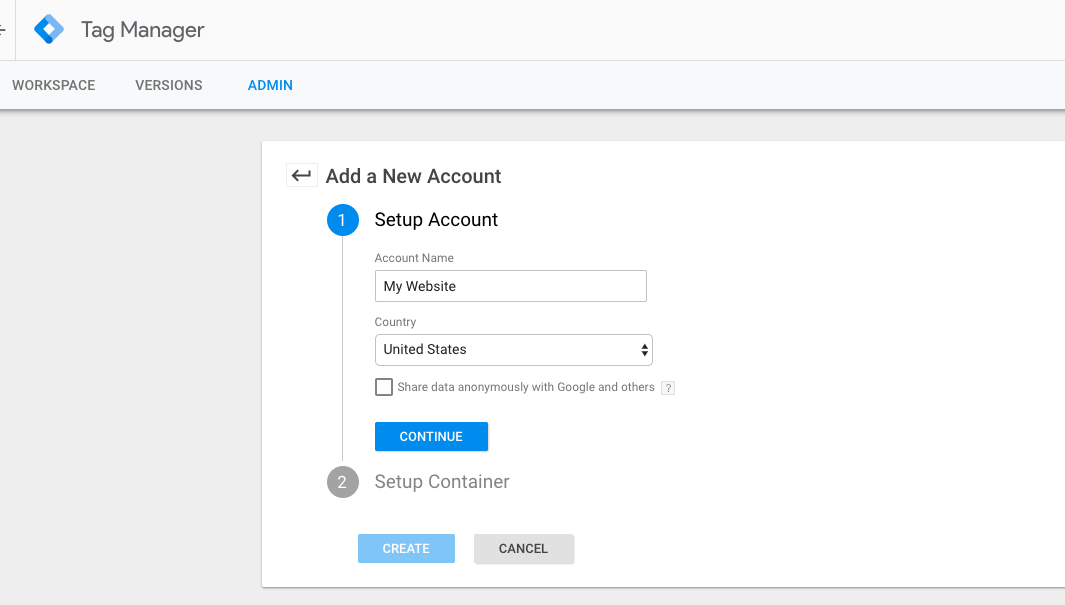
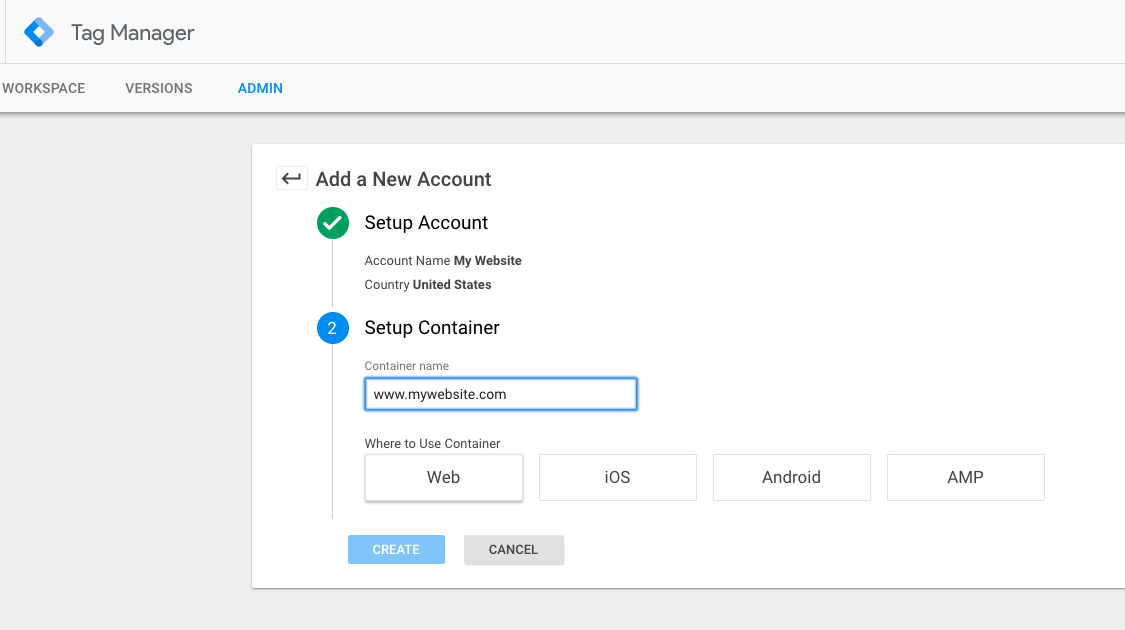
Within your account, you'll also need to create a container for your site. Generally, you� �ll want to name this the domain name where the GTM container will be used.
Select Web and click Create to start your account.
Next, you'll see a box appear containing the code to add to your site. You' ll need to add the first snippet of code toward the top portion of the site and the second snippet right after the opening tag.

Note that if you use WordPress, you can also install GTM using this plugin. Some other CMS platforms have built-in GTM integration; check with your provider's support if you're unsure where to go.
Checking Tag InstallationTo double-check that GTM is installed properly, install the Google Tag Assistant extension in Chrome.
Now, navigate to the page you wish to check and click the extensions' icon in your browser bar.
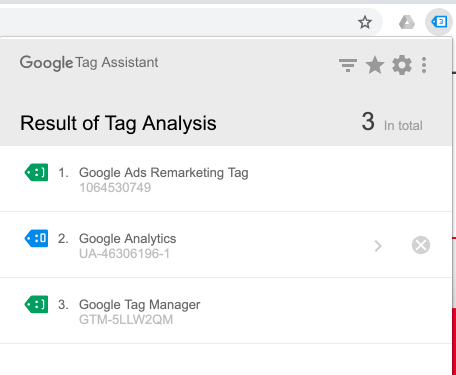
You should now see Google Tag Manager listed, along with any other active tags for Google products.
You can click on the tag to see more details about errors for troubleshooting.
1. Implementing Google Ads TagsFor Google Ads, you can deploy both conversion and remarketing tags through GTM.
First, we'll implement a conversion tag.
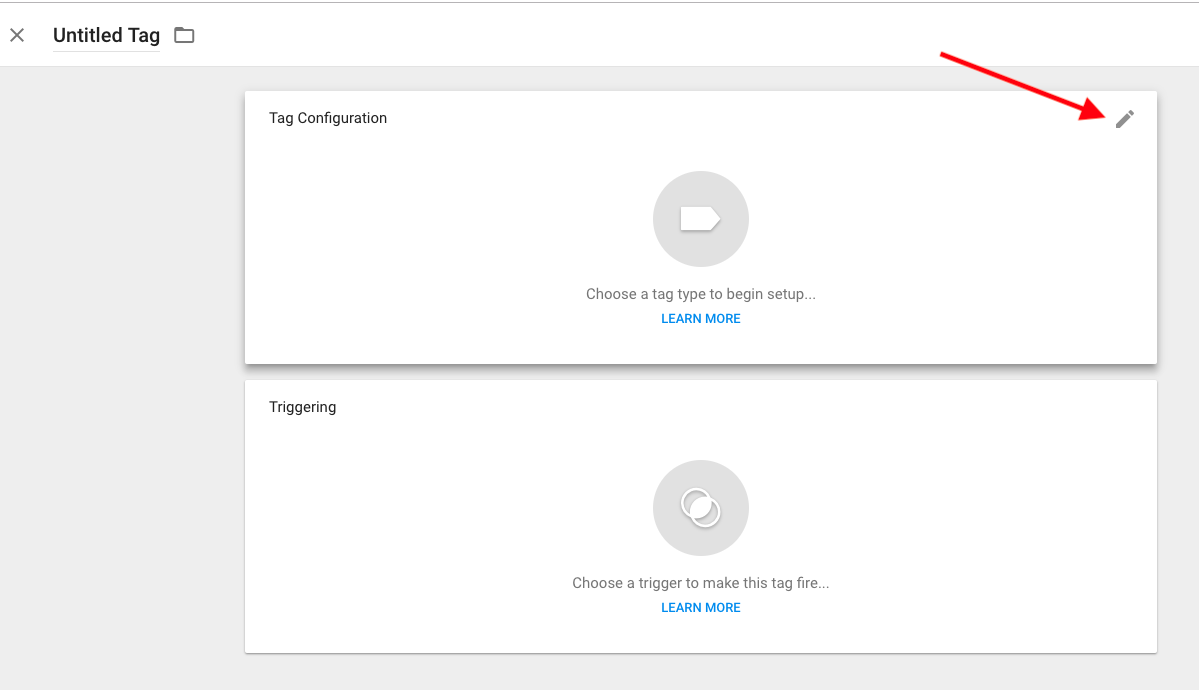
Adding a Google Ads Conversion TagNavigate to your desired GTM account and container. On the overview screen, select Add a New Tag.
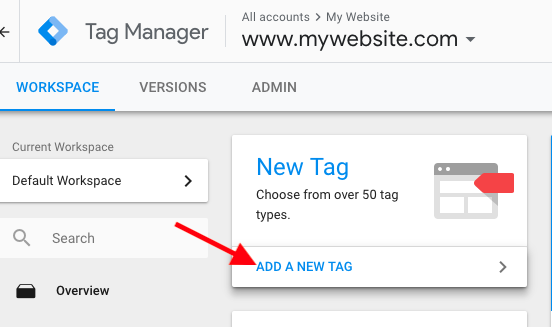
In the window that appears, click in the Tag Configuration to choose a tag type.
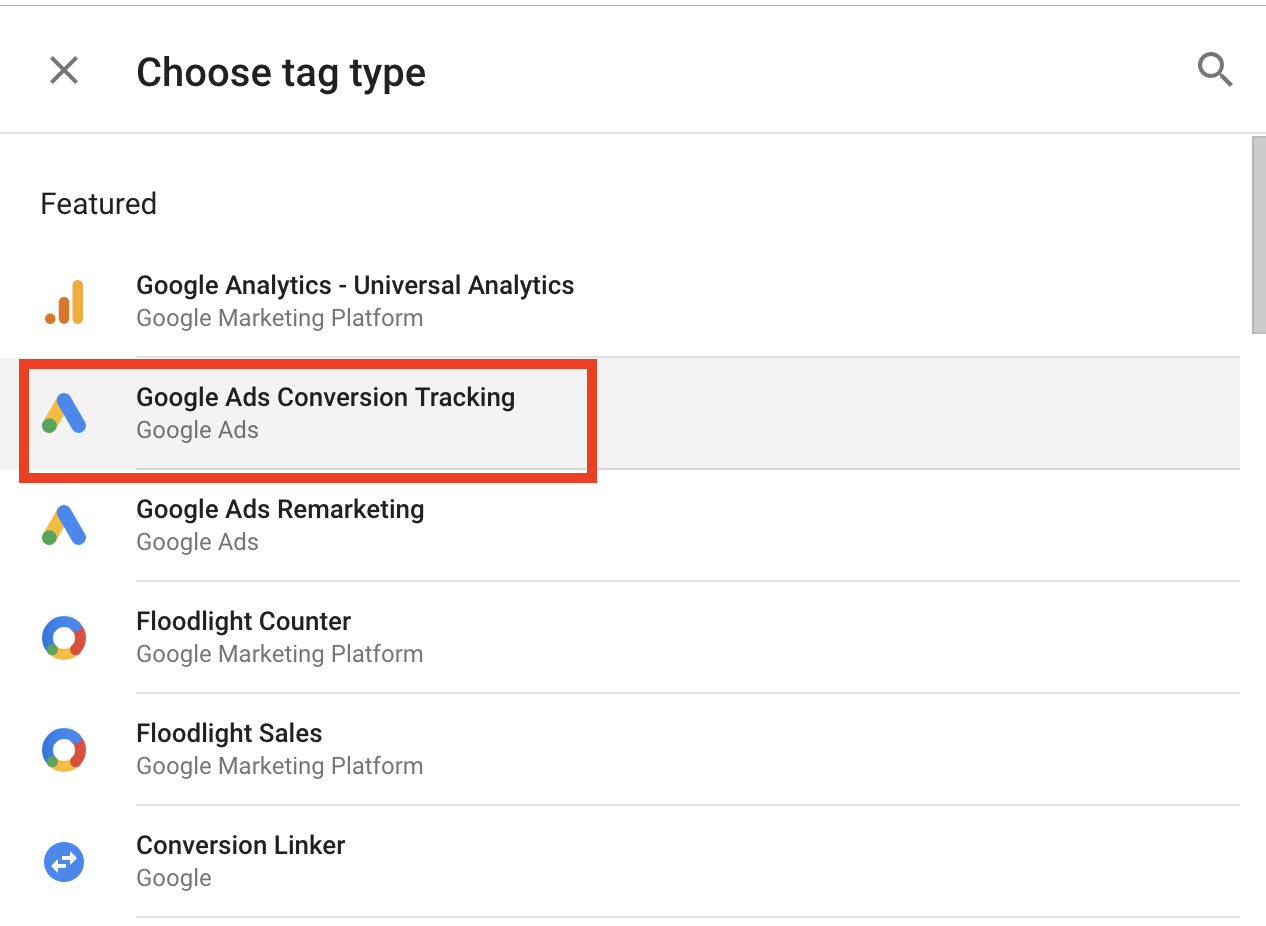
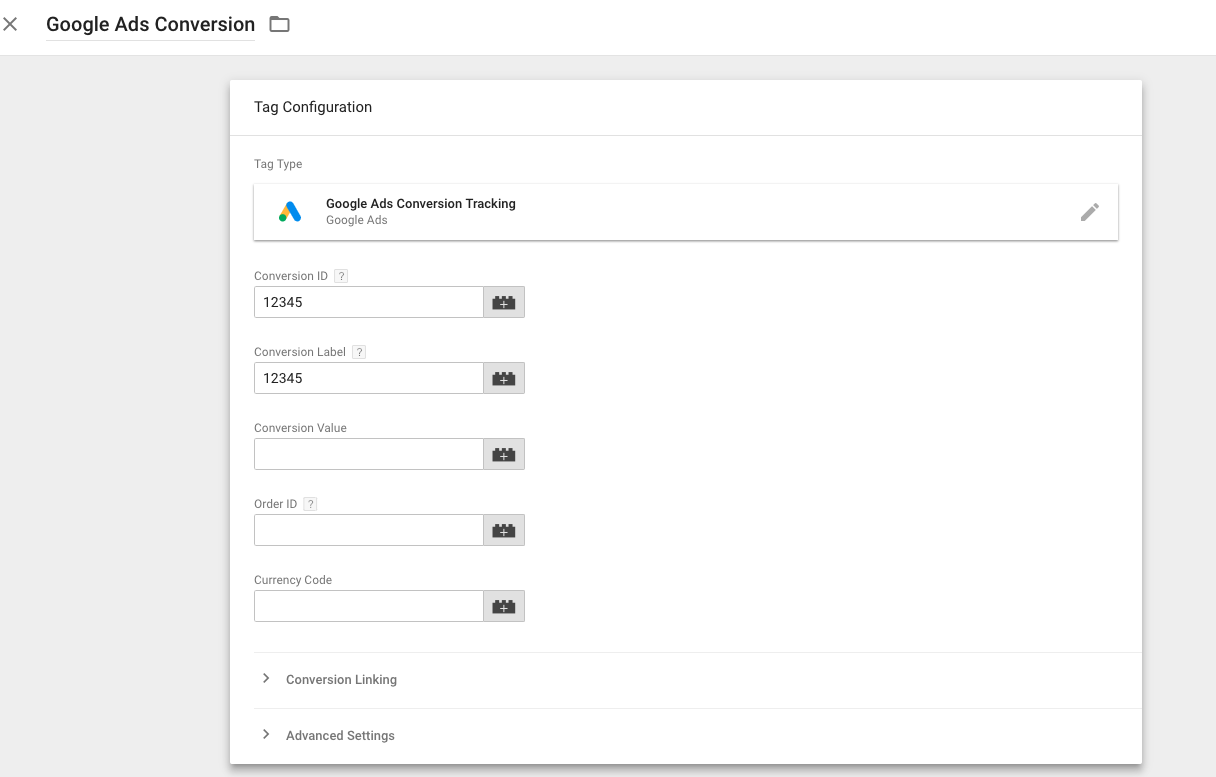
Select Google Ads Conversion Tracking.
Now, go to your Google Ads account in another tab or window to grab the Conversion ID and label. Click the Tools icon on the top menu and se lect Conversions.
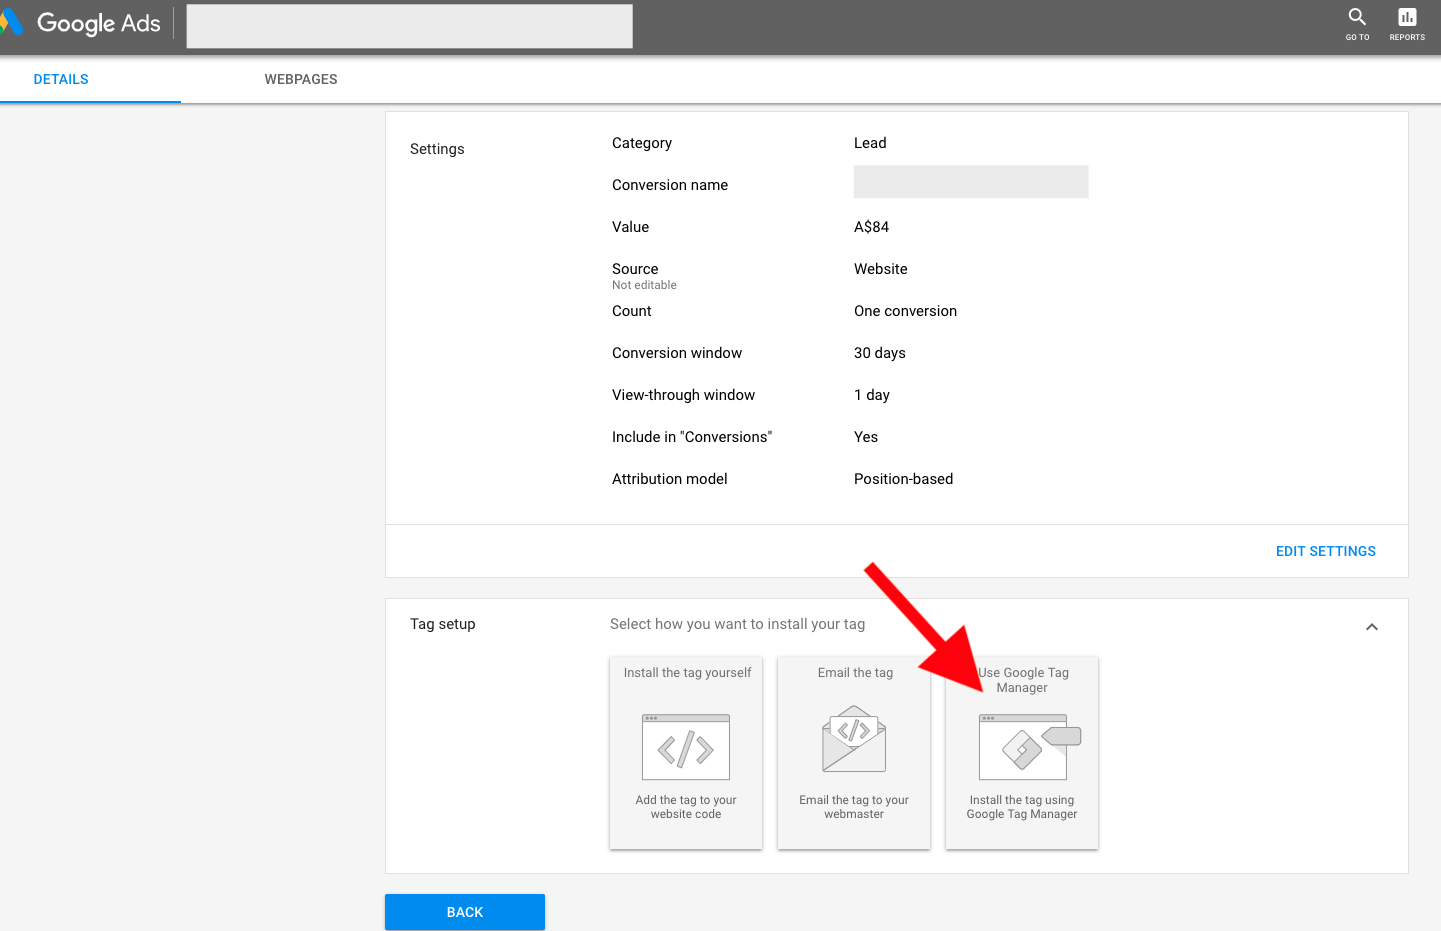
Next, either create a new conve rsion or click an existing one to edit. Under the Tag Setup section, select the option to Use Google Tag Manager.
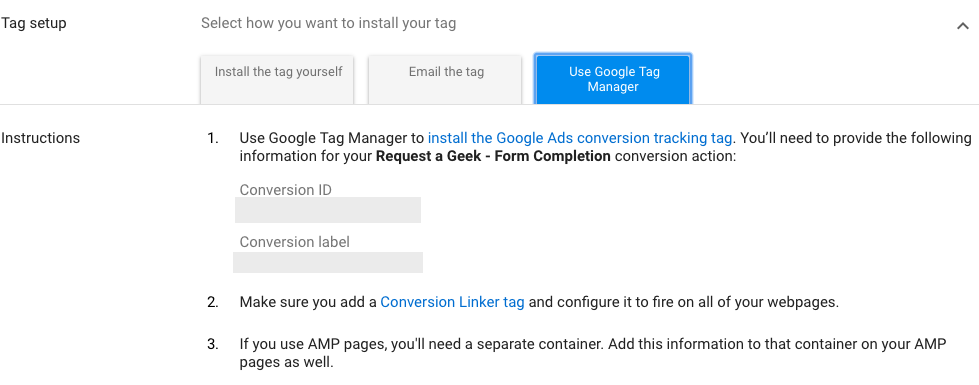
You'll now see the Conversion ID and Conversion label. Copy these and paste into the respective fields in your GTM tag.
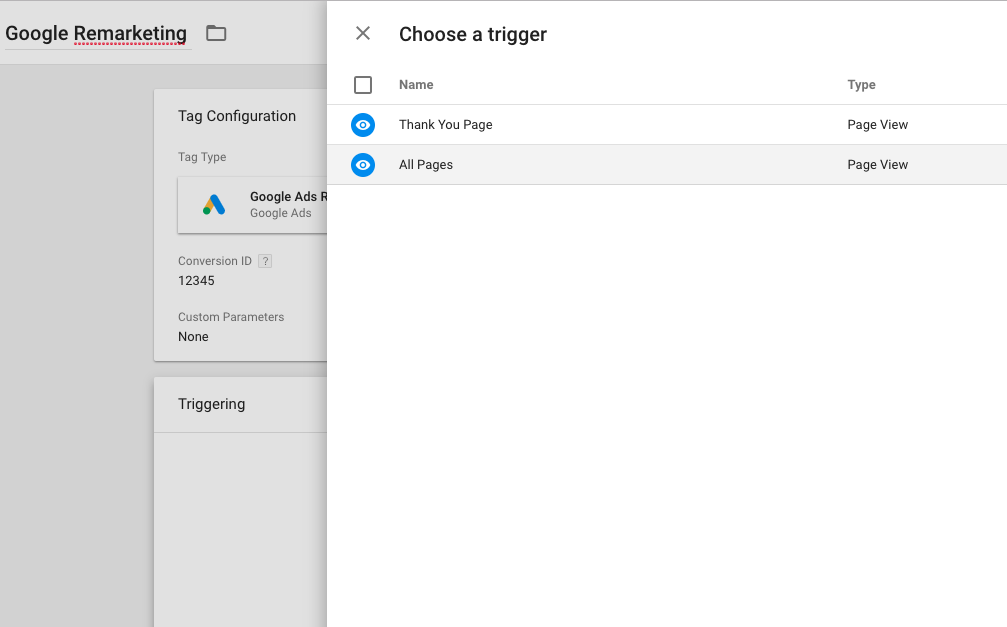
Next, add a trigger to determine where your conversion tag fires on the site. Of cour se, what you define as a conversion will vary from site to site, and the setup will be different for each.
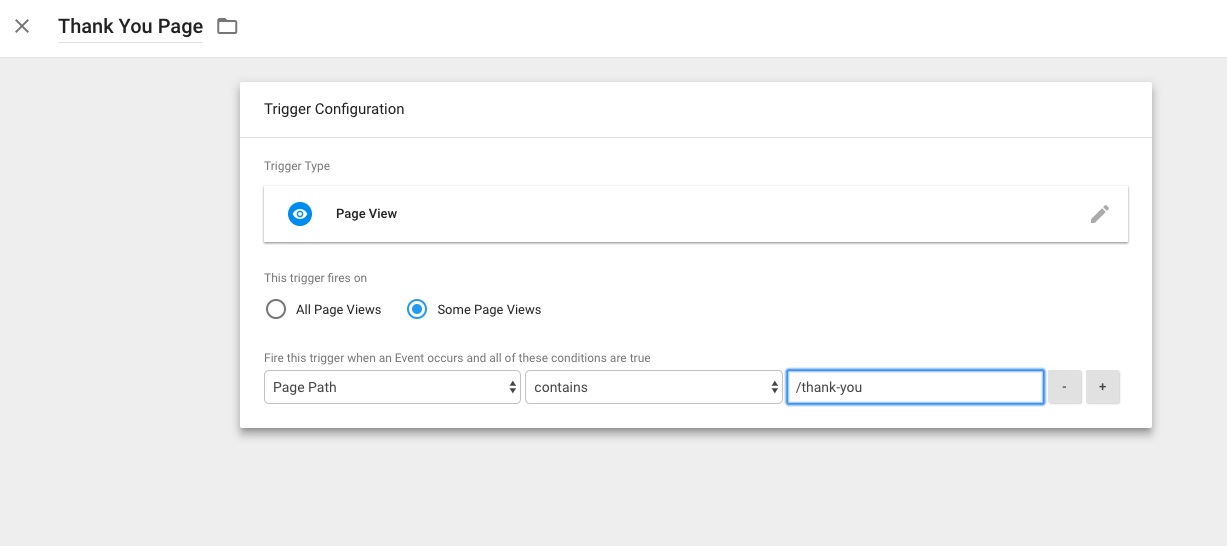
In this instance, we'll set up a conversion to fire on a "Thank You" page, assuming that a user sees this page after submitting a form.
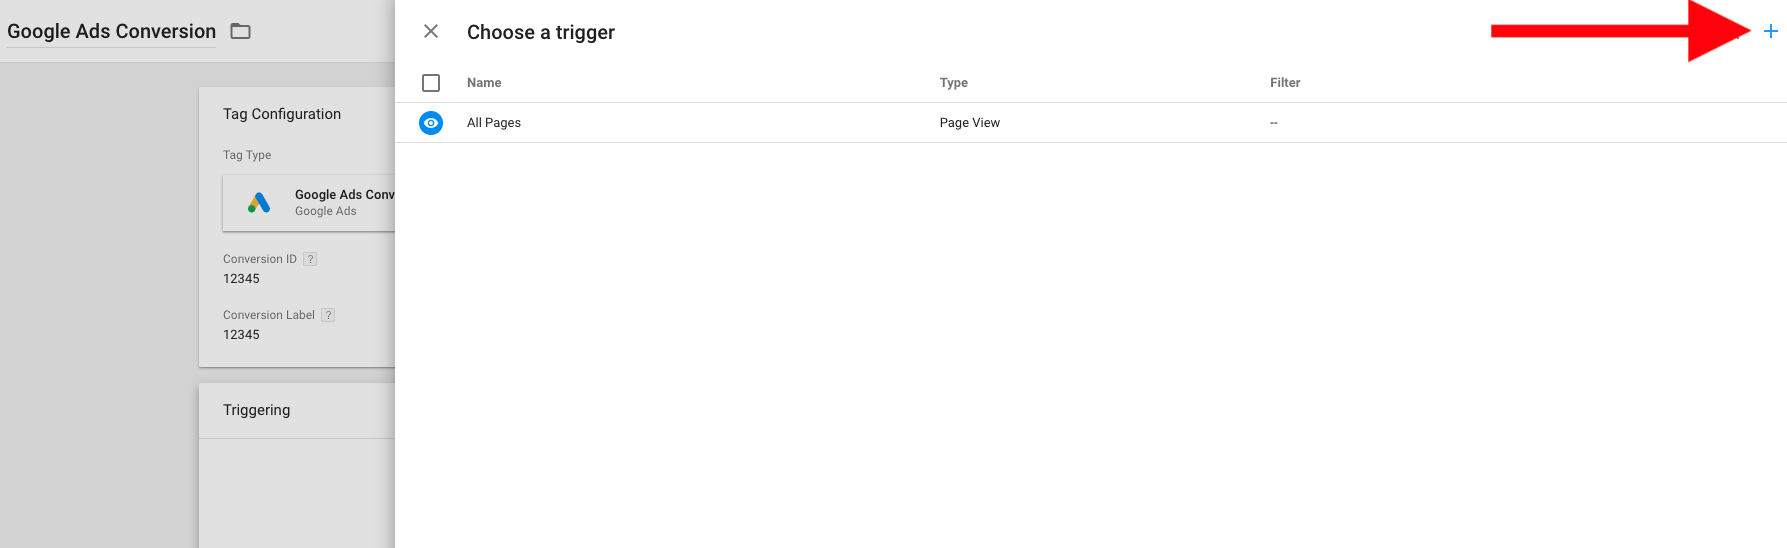
Click within the Triggering section to begin setting up your trigger. Within the window that appears, click the Plus (+) button in the upper right to add a new trigger.
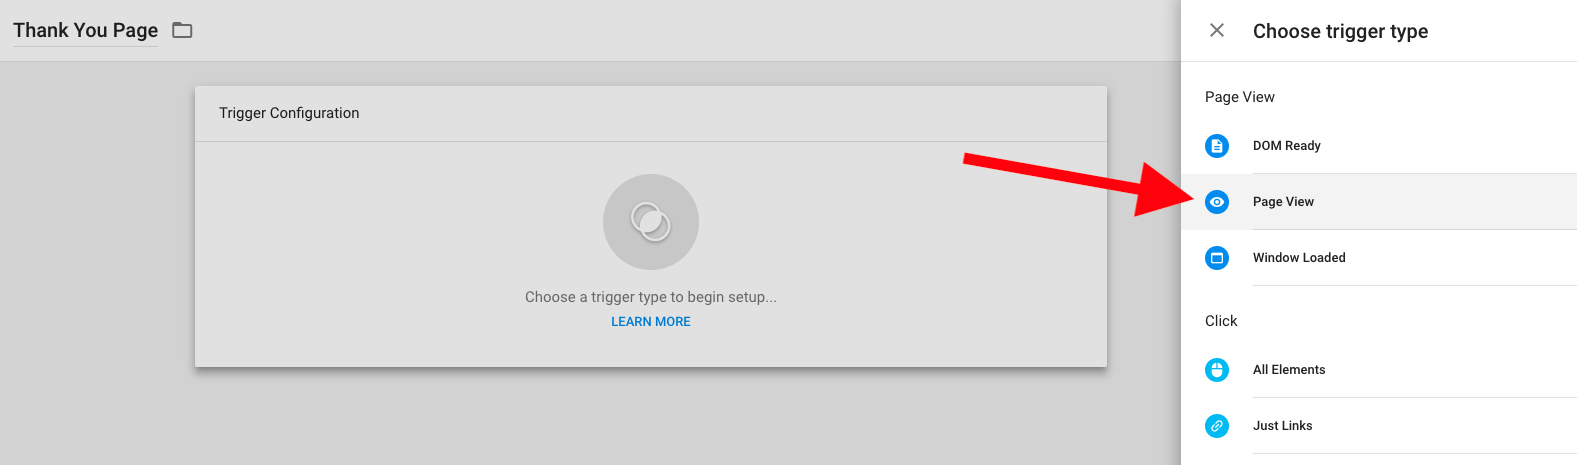
Name the trigger based on the specific c onversion point you're wanting to track. Click within Trigger Configuration to select the type of trigger. For this example, we'll select Page View to track all hits to a certain URL.
Select Some page views so the trigger only fires on defined pages. Next, use the section below to define where the trigger will fire. We'll set up a rule for a Page Path that contains /thank-you.
Save your trigger, and save your tag. For now, your edits will live in your workspace within GTM. Note that to push any G TM edit live on your site, you'll need to click Submit and then Publish.
Next, we'll add a remarketing tag.
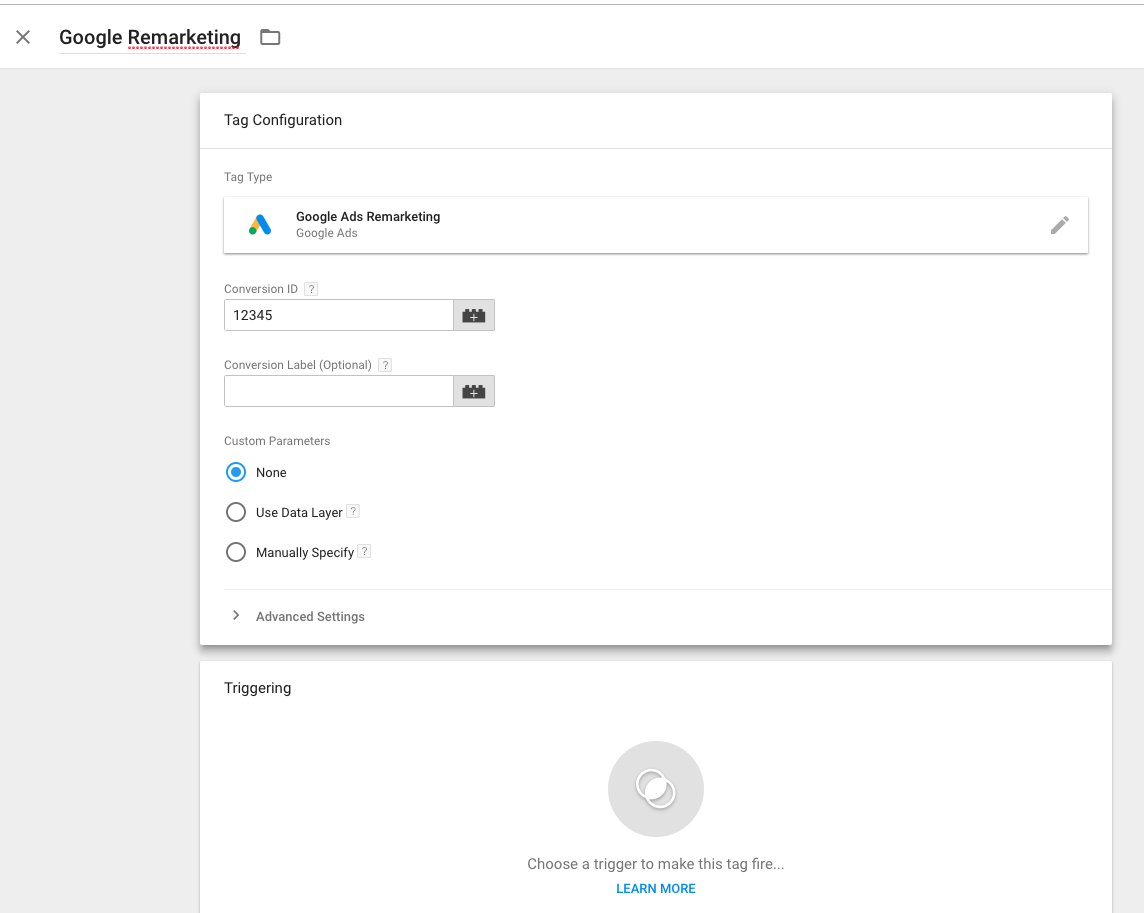
Adding a Google Ads Remarketing TagCreate a new tag in GTM and select a tag type of Google Ads Remarketing. Now, you'll need to find your remarketing tag in your Google Ads account (or enable it if you haven't done so).
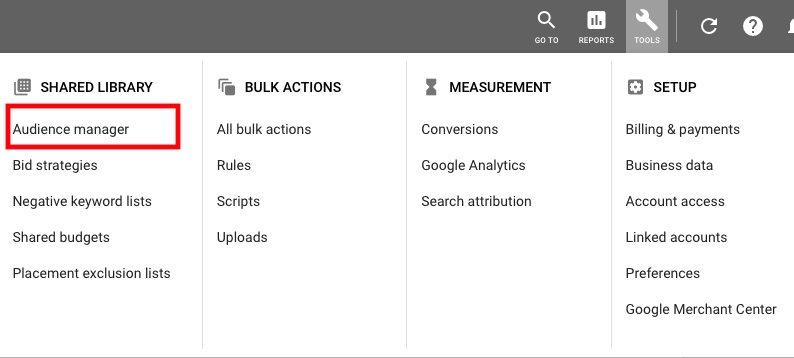
Navigate to Tools > Audience Manager from the top menu.
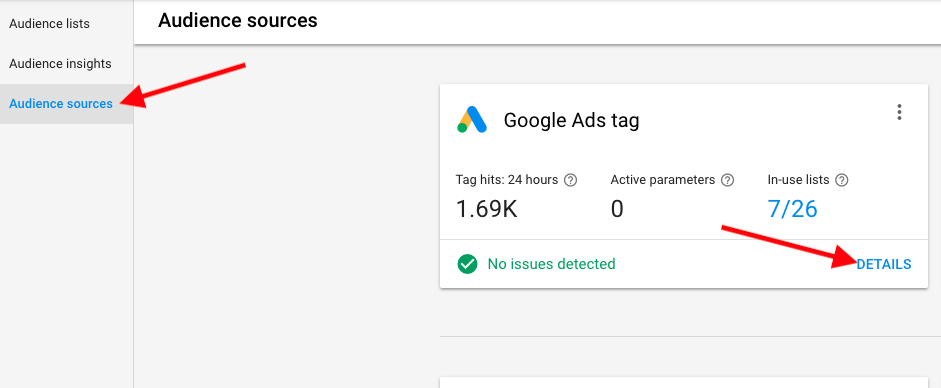
Next. select Audience sources from the left menu. If your Google Ads tag is already active, click Details; otherwise, you'll see an option to create your tag.
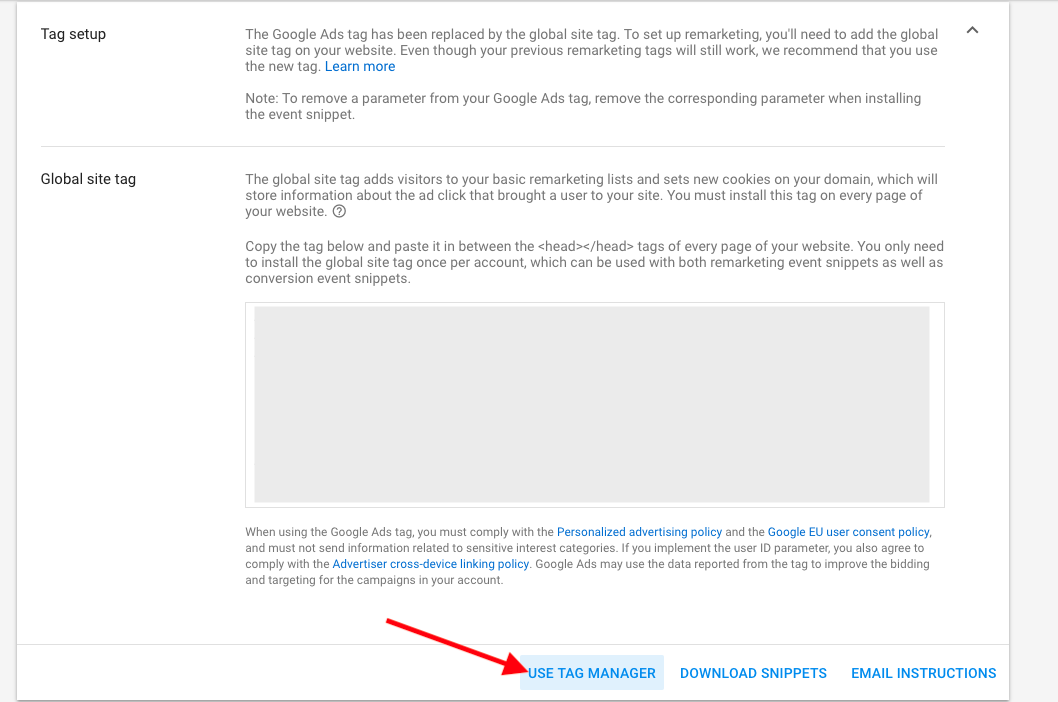
On the Details page, scroll to the bottom Tag setup section and click it to expand. Next, click Use Tag Manager at the bottom of that section.
You'll see a box appear with your Conversion ID, which you can then copy and paste into the corresponding GT M box. Note that you don't need a Conversion Label for a remarketing tag.
Next, click the "Triggering" section to choose where your remarketi ng tag should fire. If you simply want to include the tag across your entire site, choose All Pages. You can also set up triggers to fire the code only on select pages if necessary.
Finally, save your tag, and don't forget to publish it live once ready!
2. Adding the Bing UET TagNow, we'll cover setting up the Bing Ads tag in GTM. Create a new tag and select Bing Ads Universal Event Tracking as the tag type.
Next, go to your Bing Ads account to obtain the UET ID. Navigate to Conversion Tracking > UET tags from the left column.
If you haven't yet created the tag, you'll see a prompt to walk through setting it up. If the tag was previously set up, you can copy the Tag ID from the table.
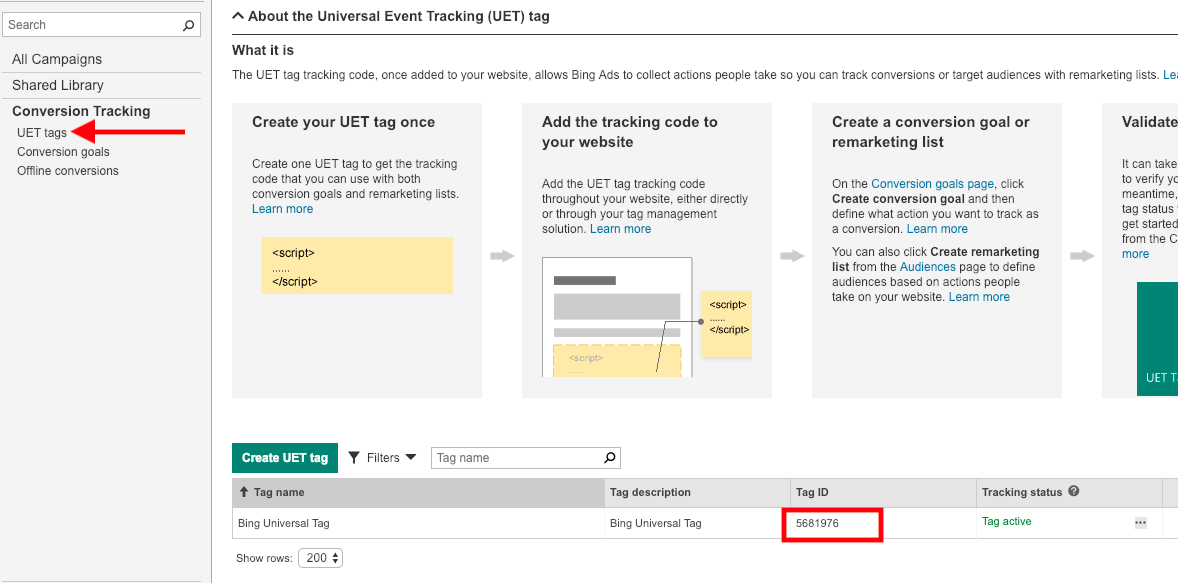
Paste the ID into the proper field in GTM. For the default setup, you won't need to adjust any of the advanced settings.

Next, choose a trigger for where you want the tag to appear. Since the Bing UET tag is a global tag, you'll most likely want to fire this on all pages.
Once the global tag is in place, you can also add additional tags for event-based conversions. Use the same Tag ID, and select an Event Type of "custom." Then, you can define parameters based on what you've set up in Bing for your custom conversion.
To check the setup of the UET tag, you can use Bing's UET helper Chrome extension.
3. Adding the Facebook PixelWhile the previous two platforms we covered have built-in GTM templates, Facebook Ads does not.
Thankfully, GTM includes a Custom HTML tag as an alternative option, and Facebook offers a direct integration to make the setup process simple.
To access your pixel from your Facebook Ads account, mouse over the menu from the top bar and select Pixels. If you haven't yet set up a pixel, you'll be prompted to do so.
![]()
Otherwise, click Details on the proper pixel and Set up.
![]()
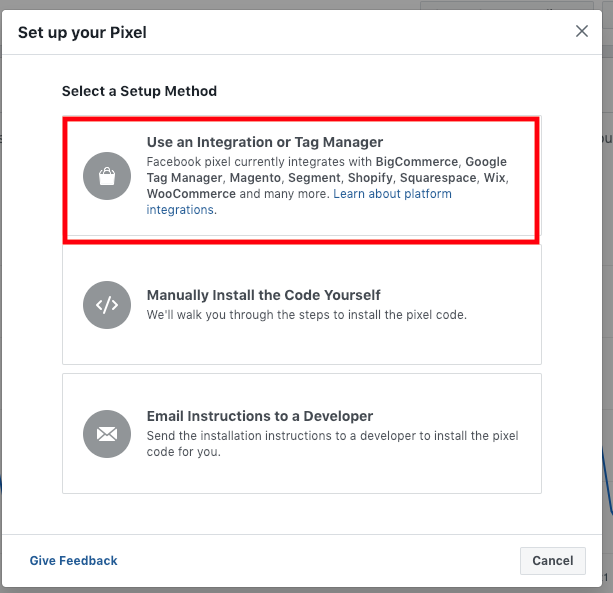
Now, you'll see a box with options to select a setup method.
Click Use an Integration or Tag Manager and then select Google Tag Manager from the options that appear.
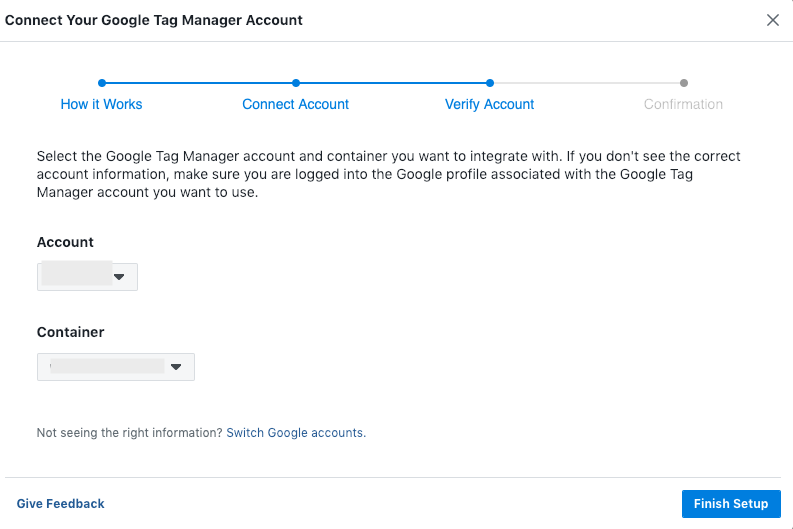
You'll now see a series of steps walking you through logging into your account, selecting the proper GTM container, and finalizing setup.
To check the setup of the Facebook Pixel, you can use the Facebook Pixel Helper Chrome Extension.
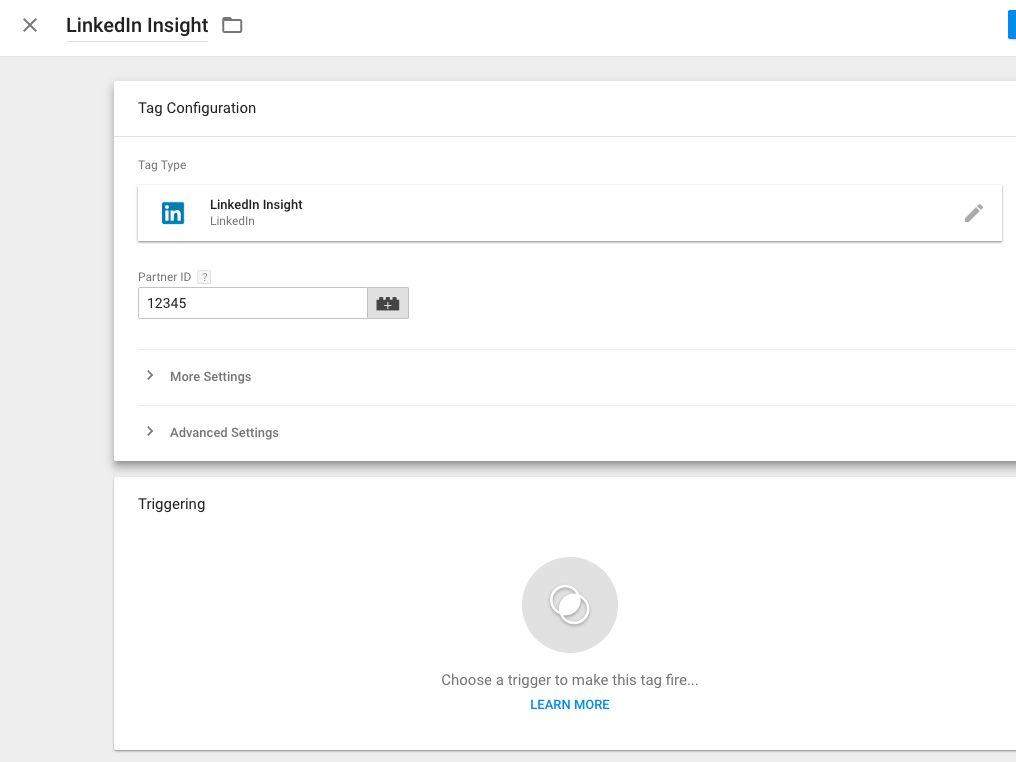
4. Adding the LinkedIn Insights TagTo add LinkedIn's tag in GTM, create a new tag and select LinkedIn Insight as the tag type. You'll now need to grab the Partner ID from your LinkedIn Ads account.
From within your account, go to the Account Assets dropdown on the top bar and select Insight Tag.
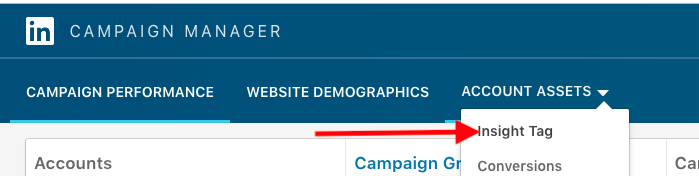
You'll now see the code for your tag, or be prompted to set the tag up if you haven't done so yet.
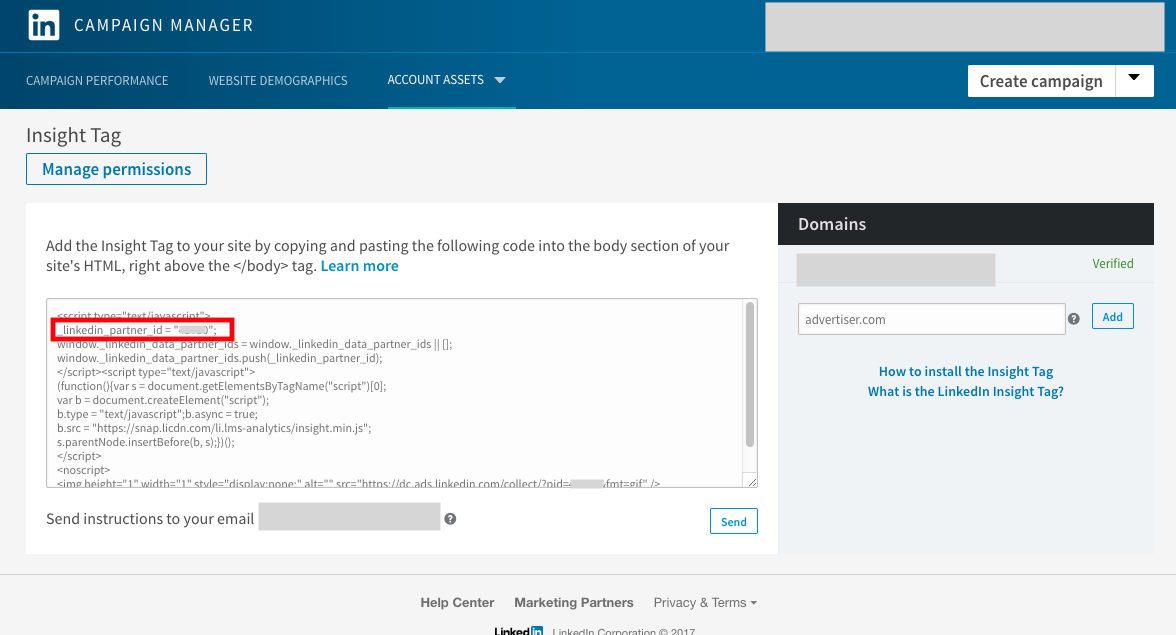
Look for the second line of code, which sho uld look like the following (the number will vary):
_linkedin_partner_id = "12345";
The number within the quotes is your Partner ID, so add that to the field in GTM.
Now, add a trigger for all pages (or define any specific criteria necessary for where the tag appears or doesn't appear on your site) and publish the tag live on your site. 5. Adding the Twitter Universal Website Tag To add the Twitter Ads tag to your site, create a new tag and choose Twitter Universal Website Tag as the tag type. Next, you'll need the pixel ID from your Twitter Ads account.
From the top menu in Twitter Ads, navigate to Tools > Conversion Tracking.
![]()
On the page that appears, click "View code and installation instructions."
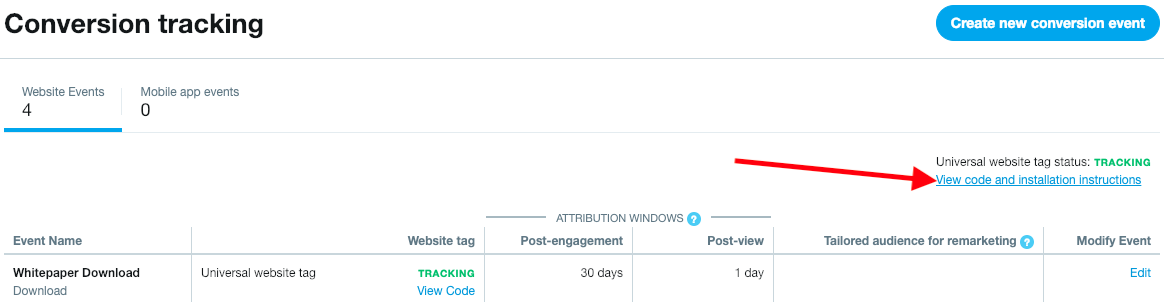
Now, you'll see the code in a text box.
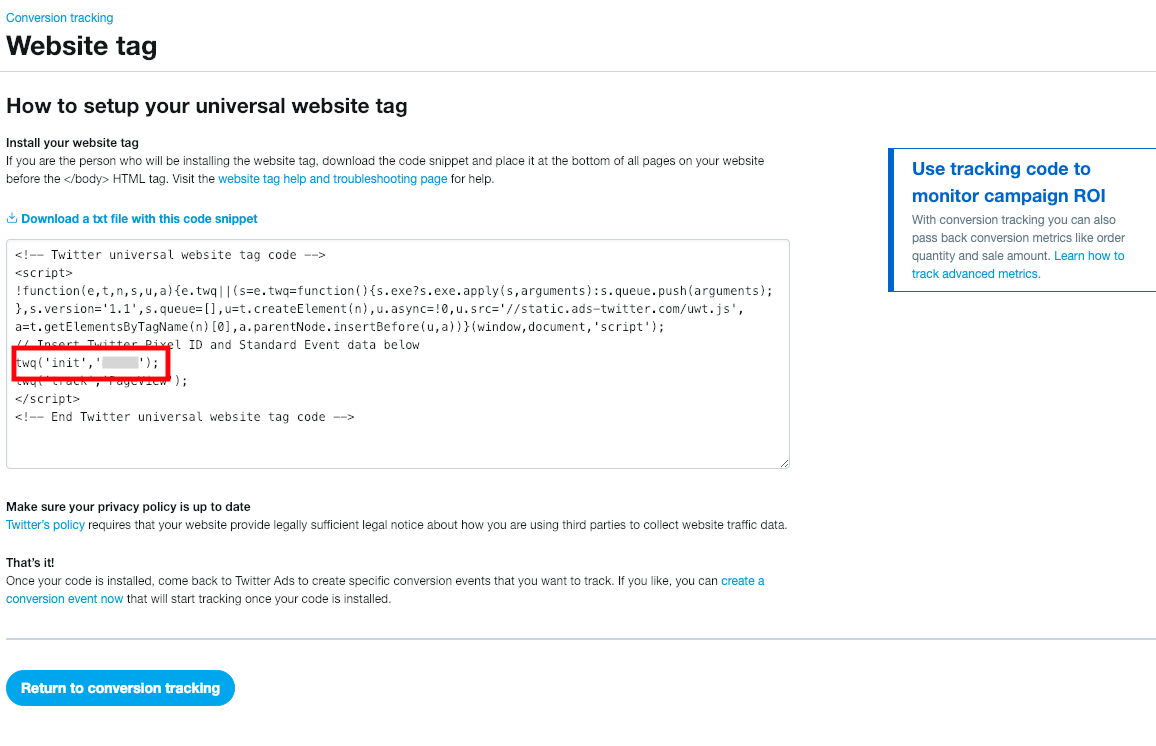
Find the line of code that looks like the following (the final stri ng in quotes will vary):
twq('init','12345');
You'll want to copy the string of characters within the second pair of quotes. Insert that string into the "Twitter pixel ID" field in your GTM tag.
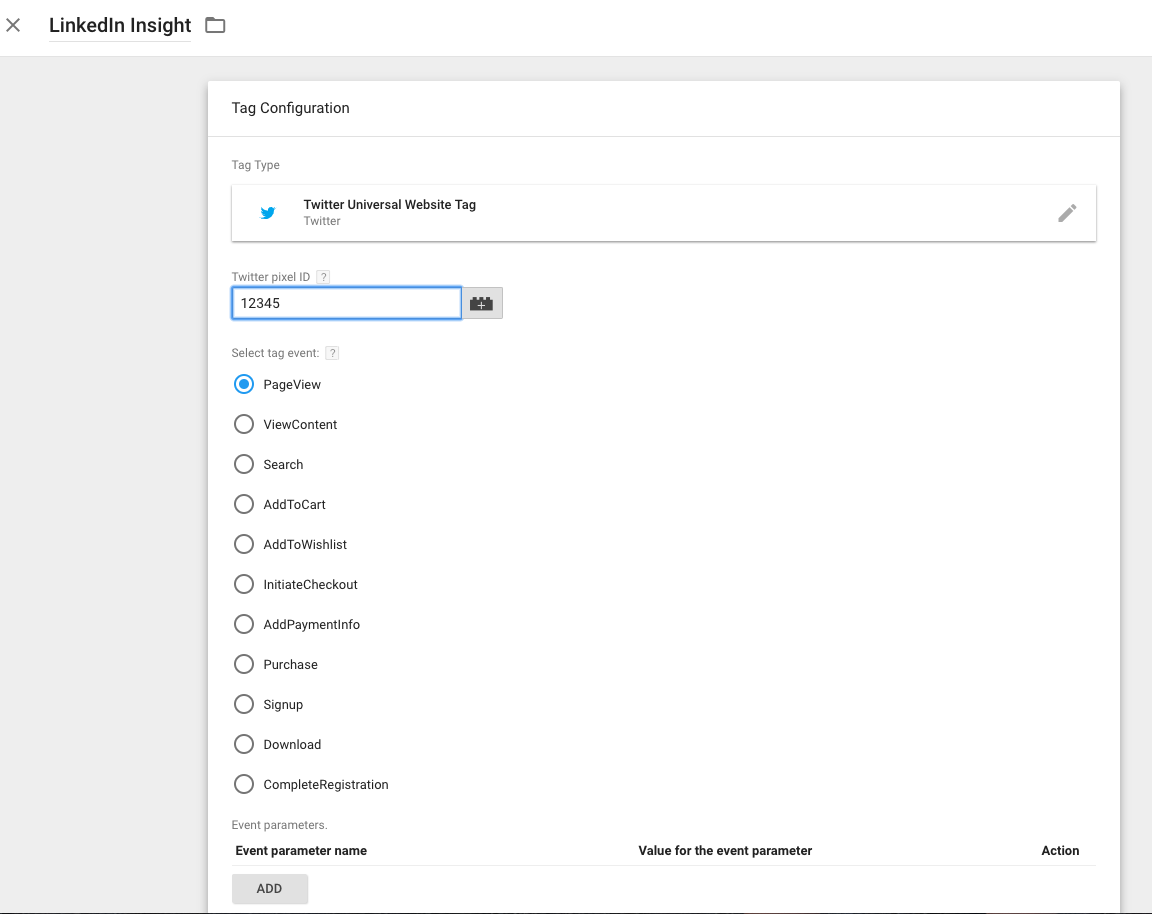
For the global pixel deployment, you shouldn't need to customize any additional settings. Add a tri gger for All Pages (or whatever pages you want the pixel to appear on) and publish it live.
ConclusionGoogle Tag Manager can help to majorly simplify tracking tag deployment for organizations of all sizes. With the ability to add tags more efficiently, you can reduce unnecessary communication and save time for other priority tasks.
If you haven't yet worked with Google Tag Manager, start an account for free and begin setting up some tags for your ad accounts.
If you've started with GTM but haven't dug in very far, try out some new templates and set up some custom HTML tags.
You'll likely find using a tag management platform an improvement on previous methods of tag implementation.
More Resources:
Image Credits
All screenshots taken by author, January 2019
Subscribe to SEJGet our daily newsletter from SEJ's Founder Loren Baker about the latest news in the industry!
0 comentários:
Postar um comentário